
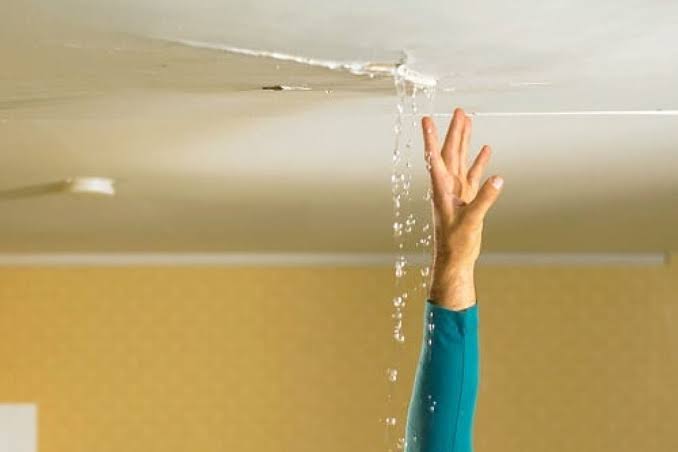
If you have a roof leak in winter, your first job is safety and containment, not the roof itself: keep people away from water near electrical fixtures, catch and move the water, protect your belongings, and document everything for insurance. Then get a roofer on the way. Nobody should climb onto a snowy or icy roof to look for the leak.
In Minnesota, most winter leaks come from ice dams, snow melting around chimneys and vents, or damage that was already there before the snow covered it. The steps below cover what to do in the first hours, how to handle an ice dam leak, and how to keep your insurance claim on solid ground.
In this article
Why a Roof Leak in Winter Happens
Knowing the likely cause helps you describe the problem to your roofer and your insurer.
Ice dams
Heat escaping from the house into the attic warms the roof deck and melts snow from underneath. The meltwater runs down to the cold eaves, refreezes, and builds a ridge of ice. Water then pools behind that ridge and gets pushed back up under the shingles, where it drips into the attic, walls, and ceilings. Building science research notes ice dams can form with as little as about 2 inches of snow on the roof.
Ice dam leaks usually show up near exterior walls: stains along the top of a wall, water around window frames, or drips at the edge of a ceiling.
Melting around penetrations
Chimneys, plumbing vents, skylights, and exhaust vents are all openings in the roof. If the flashing around them is worn or loose, snowmelt finds its way in. These leaks often show up in the middle of a room, under the penetration.
Existing damage
Missing shingles, cracked boots around vent pipes, and storm damage from earlier in the year may not leak much during dry weather. A long stretch of snow sitting on the roof and melting slowly can expose them.
Attic condensation
Sometimes the “leak” isn’t from outside at all. Warm, moist air from the house can condense and freeze on the underside of a cold roof deck, then drip when temperatures rise. A roofer can tell the difference, and it matters because the fix is in the attic rather than on the roof.
Safety First: Electricity, Ceilings, and Ladders
Water and electricity
- Keep away from water near light fixtures, ceiling fans, outlets, or switches. Don’t touch wet fixtures or flip wet switches.
- Shut off the affected circuit only if you can reach the panel safely. If the floor around the electrical panel is dry and you are dry, turn off the breaker for the area that is leaking. If the panel is wet, or you’d have to stand in water to reach it, don’t touch it. Electricity can travel through water and wet materials like carpet.
- Don’t walk into a room with standing water if electrical equipment may still be plugged in or energized.
- Have an electrician check anything that got wet before you use it again. Electrical safety groups recommend that water-damaged electrical equipment be evaluated by a qualified electrician, because restoring power without an evaluation risks fire and shock, even after things look dry.
Sagging ceilings
A ceiling that is bulging or sagging is holding water and can come down. Keep people and pets out from under it. If the bulge is not near a light fixture or wiring, many homeowners place a bucket underneath and make a small hole at the lowest point with a screwdriver so the water drains in a controlled way instead of all at once. Wear eye protection and stand to the side. If the ceiling is badly sagging, near electrical, or you aren’t sure, leave it alone and keep the area clear.
Stay off the roof
Don’t climb onto the roof to find the leak, chip ice, or shovel. Snow and ice hide the roof edge and skylights, and the surface is slick even for crews with fall protection. Minnesota energy experts specifically warn homeowners that climbing up to break up an ice dam isn’t worth the risk, and the Department of Commerce recommends a professional whenever snow removal would mean a ladder or climbing.
Interior Damage Control, Step by Step
Once the area is safe, focus on limiting the damage inside.
- Catch the water. Put buckets, pans, or storage bins under every drip. Place a towel or rag in the bottom of the bucket to cut down on splashing. Empty them before they overflow.
- Move belongings. Get furniture, electronics, rugs, documents, and anything valuable out of the wet area. If furniture is too heavy, cover it with plastic sheeting.
- Protect the floor. Lay down towels or plastic sheeting around the drip zone. Wipe up standing water quickly, especially on wood floors.
- Check the attic if you can do it safely. If you have easy attic access and can walk on the joists, look for where the water is coming in. A bucket or a piece of plastic sheeting angled to channel drips into a container can keep water off the insulation and ceiling. Don’t step between the joists, and skip this if it isn’t safe.
- Move wet insulation off the ceiling if you can do so safely. Soaked insulation holds water against the drywall. If it’s soaked and easy to reach, pulling it back reduces ceiling damage. Wear gloves, a mask, and eye protection.
- Start drying. Run fans and a dehumidifier in the affected room to speed drying and reduce the chance of mold, keeping cords and equipment away from water.
- Keep the heat on. It may seem counterintuitive with an ice dam, but a cold house risks frozen pipes and slows drying. The long-term fix for ice dams is in the attic, not the thermostat.
If It’s an Ice Dam Leak
If water is coming in near an exterior wall and you can see a thick ridge of ice and icicles along the eaves, an ice dam is the likely cause.
What can help
- Roof rake from the ground. If you can safely stand on the ground and reach, pulling snow off the lower few feet of the roof with a long-handled roof rake removes some of the snow that feeds the dam. Rake carefully, since the blade can damage shingles, and stay clear of falling snow and ice.
- Professional steaming. When an ice dam is already causing water damage inside, the Minnesota Department of Commerce recommends hiring a professional service that uses steamers to remove the ice. Steam melts channels through the dam without the damage chipping causes. Professional roof snow removal crews handle this work with the right equipment and safety gear.
What to avoid
- Don’t chip or hammer at the ice. It damages shingles, gutters, and flashing.
- Don’t use chemicals, salt, or open flame on the roof. The Minnesota Department of Commerce warns against chemically treating or heating ice off the roof.
- Don’t use a ladder against ice-covered gutters. Ladders slip easily on icy ground and gutters.
After the leak is under control
Ice dams come back unless the cause is fixed. The Minnesota Department of Commerce points to warm air leaking from the house into the attic as the real problem, and recommends sealing attic air leaks and bringing insulation up to at least R-50 where space allows. Plan that work once the emergency is over.
What About an Emergency Tarp?
An emergency tarp is a common temporary fix for storm damage, and Minnesota’s Department of Commerce lists tarping a damaged roof as a reasonable step to protect property after a loss. In winter, though, tarping is a job for professionals, not homeowners.
- A tarp can’t be properly secured over snow and ice, and it won’t seal against a roof that’s covered in snow.
- Getting a tarp up means working on a slippery roof, often in wind, which is exactly the kind of fall risk to avoid.
- When an ice dam is the cause, a tarp doesn’t help, because the water is coming from melting snow trapped on the roof.
If there’s an actual opening in the roof, such as a fallen branch, missing section, or wind damage, an emergency roof repair crew can secure it with a tarp, temporary patch, or other weatherproofing until a permanent repair is possible. Keep the receipt; insurers often reimburse reasonable emergency repairs.
Documenting the Leak for Insurance
Good documentation makes the claims process smoother. The Minnesota Department of Commerce’s guidance for homeowners after a loss comes down to a few habits:
Photos and video
- Take photos and video of the damage as soon as it is safe: ceiling stains, drips, wet walls, damaged belongings, and the outside of the house, including ice dams and icicles visible from the ground.
- Get wide shots that show the room and close-ups that show detail. Take more photos as the damage changes and after cleanup.
- Don’t put yourself at risk for a photo. Shoot the roof from the ground or a window, never from the roof.
Contact your insurer promptly
- Report the claim as soon as possible. Have your policy number, a description of what happened, and your photos ready.
- Ask for a claim number, the adjuster’s contact information, and what the next steps are. Ask about any deadlines in your policy.
- Keep notes of every conversation: date, the person’s name, and what they said.
Protect the property, but hold off on permanent repairs
Take reasonable steps to prevent more damage, such as catching water, moving belongings, and having emergency repairs done. Keep all receipts for that work. Commerce advises waiting for the insurer’s adjuster before removing, repairing, or replacing damaged property beyond those emergency steps, so the adjuster can see the damage.
Make an inventory
List damaged items with a description, approximate age, and value where you know it. Set damaged belongings aside rather than throwing them out until the adjuster has seen them or your insurer says it’s okay.
Know the terms
| Term | What it means |
|---|---|
| Deductible | The amount you pay before your coverage starts paying. |
| Actual cash value (ACV) | Value after depreciation is subtracted. |
| Replacement cost value (RCV) | Cost to repair or replace without subtracting depreciation. |
| Depreciation | Reduction in value from age, wear, or condition. |
Whether a winter leak is covered depends on your policy and the cause. Sudden damage is treated differently from gradual wear or long-term maintenance issues in many policies, so read your policy and ask your agent. If you can’t get answers from your insurer, your claim is denied without a clear reason, or you think it’s being mishandled, the Minnesota Department of Commerce’s Consumer Service Center (651-539-1600) can help with insurance questions.
Watch for storm chasers
After big storms, door-to-door sellers and high-pressure pitches show up. Commerce warns homeowners to avoid scammers and high-pressure sales tactics. Get written estimates, don’t sign anything under pressure, and confirm the contractor holds a current Minnesota license for residential roofing work through the Department of Labor and Industry’s lookup.
What Not to Do
- Don’t climb onto the roof, set a ladder on ice, or lean a ladder against icy gutters.
- Don’t touch wet electrical fixtures, switches, or a wet electrical panel.
- Don’t stand directly under a sagging ceiling.
- Don’t chip, salt, or torch ice dams.
- Don’t throw away damaged items or tear out drywall before documenting it and talking to your insurer.
- Don’t turn the heat off to stop melting; you risk frozen pipes.
- Don’t ignore a small leak. Water can spread through insulation and framing well beyond the visible stain.
What Happens When the Roofer Arrives
Have your photos, notes, and a description of where and when the water appeared ready. That helps the roofer trace the source faster, since water often travels along rafters before it drips.
In winter, the first visit usually focuses on stopping the water: removing snow and ice where needed, steaming ice dams, and making temporary weatherproofing repairs. Some permanent repairs, such as replacing shingles or resealing flashing, can be weather-dependent because many roofing materials and sealants have temperature limits in their installation instructions. Expect a two-step approach in some cases: temporary protection now, permanent roof repair when conditions allow.
Once the weather turns, a full roof inspection is worth scheduling to check for hidden damage to decking, insulation, and flashing, and to address the attic heat loss behind any ice dams.
Frequently Asked Questions
Is a roof leak in winter an emergency?
It can be. Active water coming through a ceiling, a sagging ceiling, or water near electrical fixtures needs attention right away, while a small stain that isn’t growing can usually wait for a scheduled visit.
Can a roof be repaired in the winter?
Yes, roofers handle winter leaks regularly, often starting with snow and ice removal and temporary repairs. Some permanent repairs may wait for warmer weather because many materials have temperature limits in their installation instructions.
How do I know if it’s an ice dam leak?
Ice dam leaks usually appear near exterior walls, along the top of walls, or around windows, and there is typically a thick ridge of ice and icicles along the roof edge above. Leaks in the middle of a room are more often from chimneys, vents, or other penetrations.
Should I put a tarp on my roof in the snow?
No. Tarping a snow- or ice-covered roof is dangerous and rarely effective; leave emergency tarping to a professional crew if there is an actual opening in the roof.
Does homeowners insurance cover a leaking roof from snow?
It depends on your policy and the cause of the leak. Document the damage, report it promptly, and ask your insurer how your policy treats ice dams and snow-related leaks.
Should I turn off the electricity if my roof is leaking?
If water is near light fixtures, outlets, or wiring, switch off that circuit at the breaker, but only if the panel area is dry and you can reach it safely. If the panel is wet, stay away and have an electrician check things.
A winter roof leak is stressful, but the order of operations is simple: stay safe around electricity and sagging ceilings, contain the water, document everything, and get a professional on the roof instead of going up yourself.
Dealing with a leak right now? Call Minneapolis Roofing Company at (888) 657-0348 for help with winter leaks and a free estimate on the repair.