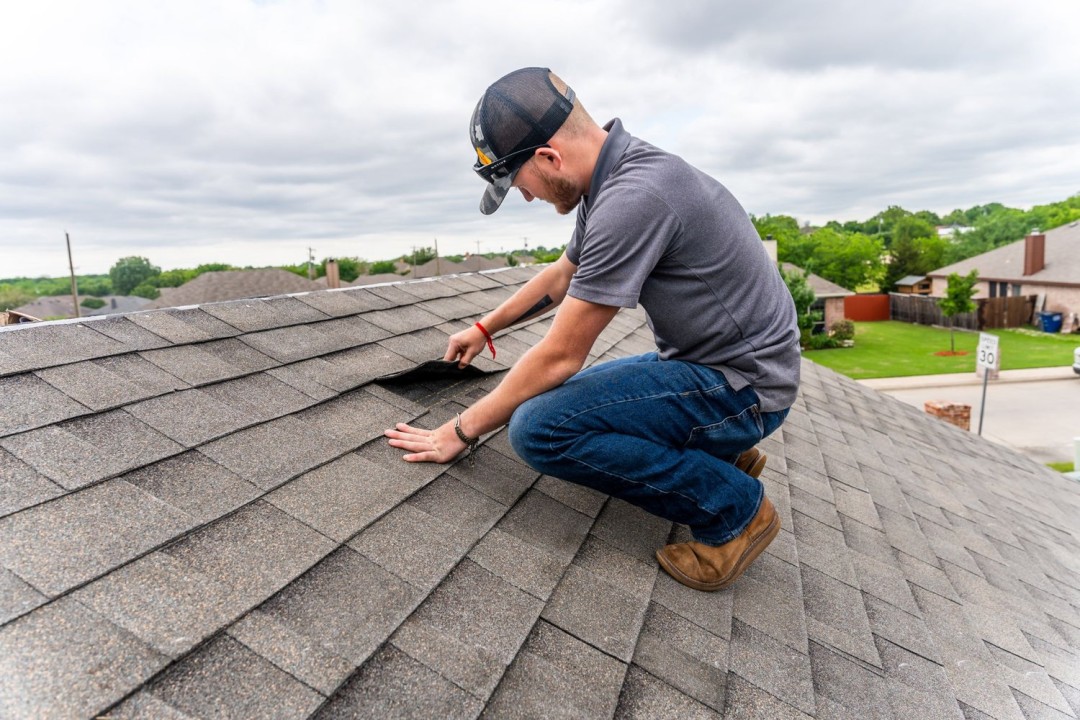
A good roof inspection checklist for homeowners covers four areas you can reach safely: the roof surface as seen from the ground, the gutters and downspouts, the attic, and the ceilings and walls inside your home. You never need to climb onto the roof to do it. A pair of binoculars, a flashlight and a phone camera will show you most of the warning signs that matter.
In Minnesota, the best times to run through the list are spring after the snow melts, fall before the first snowfall, after any hail or windstorm, and once in mid-winter for ice dams and attic frost. Below you’ll find the full checklist in a table you can print, an explanation of each item, and what a professional looks at that you can’t see from the ground.
In this article
- Safety First: Inspect From the Ground and the Attic Only
- What You Need Before You Start
- The Printable Roof Inspection Checklist
- Exterior Checks From the Ground
- Gutters and Downspouts
- Attic Checks
- Interior Ceilings and Walls
- When to Inspect Your Roof in Minnesota
- What a Professional Roof Inspection Adds
- How to Record What You Find
- Red Flags That Need Prompt Attention
- Frequently Asked Questions
Safety First: Inspect From the Ground and the Attic Only
Most roofing injuries happen at the edge of the roof or on a ladder, not during the actual work. That’s why this checklist is built around two safe vantage points: your yard and your attic. Leave anything that requires walking on shingles, leaning off a ladder or reaching over a gutter to a professional with fall protection.
- Stay off the roof. Shingles are slippery when wet, frosty or dusty with loose granules, and steep pitches are dangerous even in dry weather.
- Keep your feet on the ground. Nothing on this checklist needs a ladder. Winter safety guidance from the Insurance Institute for Business & Home Safety (IBHS) specifically warns against climbing ladders in snowy or icy conditions.
- Watch for power lines. Never raise a metal pole, roof rake or ladder near the service drop. Aluminum roof rakes conduct electricity.
- Step only on framing in the attic. Walk on joists or a floored path. Stepping between joists can put your foot through the ceiling below.
- Protect yourself in the attic. Wear long sleeves, gloves and a dust mask, and bring a bright flashlight. Attics can be very hot in summer and very cold in winter.
- Leave suspect insulation alone. In older homes, some insulation and building materials may contain asbestos. The U.S. EPA advises that you can’t tell by looking and that, if in doubt, you should treat the material as if it contains asbestos and not disturb it.
What You Need Before You Start
- Binoculars. Even an inexpensive pair lets you see shingle edges, flashing and ridge caps clearly from the yard.
- A phone or camera with zoom. Photos give you a dated record to compare year to year, and they’re useful if you ever need to file an insurance claim.
- A strong flashlight or headlamp for the attic and for checking ceilings at an angle.
- A notepad or the printed checklist below, plus a simple sketch of your roof so you can mark where you saw problems (front, back, left slope, garage, porch).
- A bright, dry day. Shadows and glare can hide damage. Mid-morning or mid-afternoon light at a low angle often shows lifted or creased shingles best.
Before you go outside, find any paperwork you have on the roof: the year it was installed, the shingle brand and the installer’s warranty documents. Knowing the roof’s age helps you judge whether what you see is normal aging or a sign of trouble.
The Printable Roof Inspection Checklist
Print this table or copy it into your notes app. Work through it in order: walk the yard first, then check the gutters from the ground, then go up into the attic, and finish inside the house. Note the location and take a photo of anything you mark.
| Area | Check | What to look for | Done |
|---|---|---|---|
| Exterior (from ground) | Overall roofline | Sagging ridge, dips between rafters, wavy deck | ☐ |
| Exterior (from ground) | Shingle field | Missing, cracked, curled, cupped or lifted shingles; bald spots where granules are gone | ☐ |
| Exterior (from ground) | Ridge and hip caps | Cracked, loose or missing caps; dark spots or bruises after hail | ☐ |
| Exterior (from ground) | Flashing | Bent, lifted, rusted or missing metal at chimneys, walls, skylights and valleys | ☐ |
| Exterior (from ground) | Roof penetrations | Damaged vent caps, cracked pipe boots, dented roof vents | ☐ |
| Exterior (from ground) | Chimney | Missing or crumbling mortar, leaning, damaged cap or crown | ☐ |
| Exterior (from ground) | Edges, fascia, soffits | Rot, peeling paint, staining, gaps where animals could enter | ☐ |
| Exterior (from ground) | Growth and debris | Moss, piles of leaves or needles, overhanging branches | ☐ |
| Gutters | Gutter runs | Sagging, pulling away from fascia, overflow marks, standing water | ☐ |
| Gutters | Granules | Heavy build-up of shingle granules in gutters or at downspout outlets | ☐ |
| Gutters | Downspouts | Disconnected sections, clogs, water draining against the foundation | ☐ |
| Gutters | Storm evidence | Dents in gutters and downspouts, spatter marks on metal after hail | ☐ |
| Attic | Roof deck underside | Water stains, dark or soft spots, daylight through boards | ☐ |
| Attic | Moisture | Frost on nails or sheathing in winter, damp insulation, mold or musty smell | ☐ |
| Attic | Insulation | Thin, compressed or uneven insulation; gaps around hatches and light fixtures | ☐ |
| Attic | Ventilation path | Blocked soffit vents, insulation stuffed against the roof deck at the eaves | ☐ |
| Attic | Exhaust ducts | Bath or kitchen fans venting into the attic instead of outdoors | ☐ |
| Attic | Pests | Droppings, nests, chewed wood or wiring | ☐ |
| Interior ceilings | Top-floor ceilings | Brown rings, bubbling paint, sagging drywall | ☐ |
| Interior ceilings | Exterior walls and windows | Stains or peeling paint near the top of walls, especially under eaves | ☐ |
| Interior ceilings | Around chimneys and skylights | Damp drywall, stains or drips after rain or snowmelt | ☐ |
One or two minor items, like a single lifted shingle or a clogged downspout, are normal maintenance. Several items in the same area, or any sign of water inside the house, are a reason to book a professional look soon.
Exterior Checks From the Ground
Walk all the way around the house, and step back far enough to see each roof slope at an angle. Check detached garages, porch roofs and any low-slope sections too. Many problems start on the slopes you don’t see from the street.
The overall roofline
Look along the ridge and the eaves. They should be straight. A ridge that dips in the middle, or a roof surface that looks wavy between rafters, can point to a weakened deck, water damage or a structural issue. That’s not a DIY fix and should be checked promptly.
Shingles
Scan each slope with binoculars and look for:
- Missing shingles or exposed strips of a different color, often after wind.
- Curling or cupping, where edges turn up or the middle sinks. This usually shows a roof that’s aging or overheating from poor attic ventilation.
- Cracks and creases, especially a horizontal crease across a shingle, which can mean it was lifted by wind and folded back.
- Granule loss, seen as dark, shiny or bald patches where the asphalt is showing.
- Random dark spots after a hailstorm. IBHS describes hail damage on asphalt shingles as random impact marks, bruises and cracks, and notes that ridge caps are especially vulnerable.
Flashing and roof penetrations
Leaks start at transitions more often than in the middle of a slope. Look at the metal around the chimney, where the roof meets a wall, around skylights and down any valleys. Flashing should lie flat and be continuous. Also look at plumbing vent pipes, roof vents and exhaust caps for cracks, dents or missing pieces.
Chimney
From the ground, check for leaning, missing or crumbling mortar, loose bricks and a damaged cap or crown. Chimney safety guidance based on NFPA 211 calls for chimneys, fireplaces and vents to be inspected at least once a year, so a chimney sweep’s visit is a good time to ask about the flashing too.
Edges, fascia and soffits
Peeling paint, dark stains or soft-looking wood on the fascia boards can mean water is getting behind the gutters or under the roof edge. Gaps in the soffit are also an invitation to squirrels, bats and birds.
Trees, moss and debris
Branches that touch or hang over the roof scrape shingles, drop debris and give animals a path. Piles of leaves or pine needles in valleys and behind chimneys hold moisture against the roof. Moss and heavy debris are worth having cleared by a pro, rather than scraping or power-washing them yourself.
Gutters and Downspouts
Gutters tell you a lot about the roof above them, and most of what matters can be seen from the ground. This checklist doesn’t call for a ladder. If something needs a closer look or a cleaning, that’s a job for a gutter or roofing pro with the right equipment.
- Sagging or pulling away. Loose hangers let gutters tip, so water spills behind them onto the fascia and down the wall.
- Overflow marks. Dirty streaks down the face of the gutter or on the siding below mean water is going over the top, usually because of a clog.
- Granules. Some granule shedding is normal on a new roof. A heavy build-up in gutters or a sandy fan at the downspout outlet on an older roof is a sign the shingles are wearing out. Granules at the downspout don’t prove hail damage on their own, but they’re worth noting after a storm.
- Dents and spatter. After hail, look for dents in gutters and downspouts and for spatter marks (small clean spots where hail knocked off grime or oxidation) on metal surfaces. IBHS points out that spatter shows hail fell but is not damage by itself. It’s a clue to look closer at the roof.
- Downspout discharge. Water should drain well away from the foundation, not pool next to the house.
Attic Checks
The attic is where you can see the underside of the roof deck, and it’s where many Minnesota roof problems actually begin. Check it on a bright day so you can spot daylight, and again during a cold snap in winter.
Signs of leaks
- Water stains or dark streaks on the underside of the roof boards and on rafters or trusses. Trace them uphill. Water often enters higher than where it drips.
- Soft or delaminating sheathing, which you can sometimes see as sagging between framing members.
- Pinpoints of daylight through the deck (other than at ridge vents) where there shouldn’t be any.
- Damp, matted or stained insulation below a leak.
Frost, condensation and mold
In winter, look for frost on nail tips, sheathing and rafters. University of Minnesota research describes attic frost forming on wood rafters, sheathing and insulation, and notes that mold can form when that frost melts. Frost is a sign that warm, moist air from the house is leaking into the attic.
Insulation and air leaks
The Minnesota Department of Commerce explains that ice dams are caused by warm air leaking into the attic and recommends sealing air leaks first, then insulating to at least R-50 as space allows. While you’re up there, look for thin or uneven insulation, and pay attention to spots that are commonly missed, such as around the attic hatch and recessed light fixtures. Dark, dirty patches on insulation can also mark where house air is escaping.
Ventilation and exhaust fans
Make sure insulation isn’t packed into the eaves so tightly that it blocks the soffit vents, and check that bathroom and kitchen fans are ducted all the way outdoors. A fan that dumps moist air into the attic is a common cause of frost and wet sheathing. Note that Minnesota Commerce cautions against simply adding more roof vents to fix ice dams, since it often doesn’t address the real cause.
Pests
Droppings, nesting material, chewed wood or wiring mean animals have found a way in, often through a gap at the soffit, fascia or a damaged vent.
Interior Ceilings and Walls
Finish your inspection inside. Walk through the top floor with a flashlight held at a low angle to the ceiling, which makes stains and bulges easier to see.
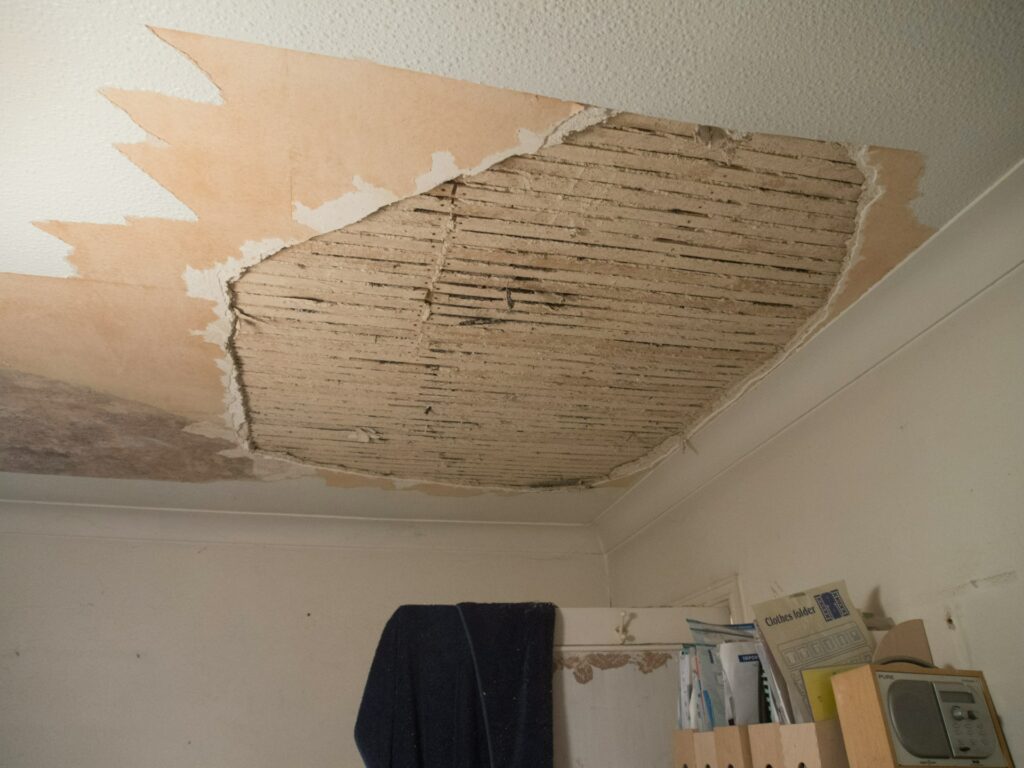
- Ceiling stains. Yellow or brown rings, bubbling paint or sagging drywall usually mean water has soaked through the insulation from above.
- Tops of exterior walls. Stains or peeling paint high on exterior walls, especially below the eaves, are a classic sign of ice dam leaks. UMN Extension notes that ice dam water can flow into exterior walls or through ceiling insulation and stain the ceiling.
- Around chimneys, skylights and vent stacks. These openings are frequent leak points. Check after a heavy rain or a quick snowmelt.
- Closets and less-used rooms. Leaks often go unnoticed in rooms you don’t use every day.
A fresh stain after a storm or a thaw is more urgent than an old, dry one. If you’re not sure whether a stain is new, circle it lightly in pencil and date it, then check again after the next rain.
When to Inspect Your Roof in Minnesota
Minnesota’s weather is hard on roofs in different ways through the year, so timing your checks to the seasons helps you catch problems early.
| When | Why | Focus on |
|---|---|---|
| Spring (after snowmelt) | Winter ice, wind and freeze-thaw cycles leave damage that shows up once the snow is gone | Missing or lifted shingles, damaged gutters, new ceiling stains, attic water marks |
| After hail or wind storms | Minnesota’s hail season begins in late May in the south and early June in the north | Dents and spatter on gutters, vents and A/C units; random dark spots on shingles; torn or missing shingles |
| Fall (before first snow) | Fix small problems before snow and ice make repairs harder | Gutters and downspouts, flashing, branches, attic insulation and air sealing |
| Mid-winter (cold snap or thaw) | Ice dams form when snow on the upper roof melts and refreezes at the colder edge | Large icicles, ice ridges at the eaves, attic frost, stains on exterior walls and ceilings |
In winter, do your checks from the ground and the attic only. Don’t try to chip ice or clear snow from a ladder. If you see an ice dam or a leak, our guide to roof repair explains how professionals handle it, and Minnesota Commerce advises against chipping ice off the roof.
Older roofs deserve more frequent attention. InterNACHI’s life-expectancy chart estimates roughly 20 years for 3-tab asphalt shingles and about 30 for architectural shingles, depending on weather and maintenance. Once your roof is getting close to that range, a yearly professional inspection is a smart addition to your own checks.
What a Professional Roof Inspection Adds
Your own checklist is a screening tool. It helps you spot problems early and decide when to call someone. A professional roof inspection goes further because a roofer can safely get on the roof and handle the materials.
It also helps to know that a general home inspection is different from a roofer’s inspection. Under the InterNACHI Standards of Practice, home inspectors inspect the roof covering, gutters, flashing and penetrations from ground level or the eaves and are not required to walk on the roof, remove snow or ice, or predict the roof’s remaining life. A roofing contractor’s inspection typically covers:
- Close-up shingle condition. Brittleness, seal-strip adhesion, nail pops, exposed or overdriven nails, and how much granule coating is left.
- Flashing details. Step and counter flashing, chimney crickets, valley metal and sealant that has dried out or cracked.
- Soft spots in the deck. A roofer can feel for spongy areas that point to rotted sheathing under the shingles.
- Hail and wind damage assessment. Hail damage is not always visible right away. GAF’s technical guidance notes it can include granule loss at impact points and cracks that are hard to see from a distance, and IBHS lists several common look-alikes that are not hail damage at all.
- Penetrations and accessories. Pipe boots, vent flashing, skylight seals, satellite and antenna mounts.
- Ventilation and attic conditions. Whether intake and exhaust are balanced and clear, and how the attic’s moisture and insulation affect the roof.
- Repair or replace advice. A professional can estimate remaining life and tell you whether targeted repairs make sense.
For hidden air leaks behind ice dams and attic frost, a home energy auditor can add tools like a blower door test and an infrared camera. University of Minnesota research notes these problems can be undetectable without that kind of equipment.
After a hailstorm, a careful professional inspection is especially important. If the damage looks significant, see our hail damage roof repair page for what that process involves.
How to Record What You Find
A simple record turns a one-time check into a useful history of your roof.
- Take dated photos of each slope from the same spots every season. Comparing them makes slow changes like curling or granule loss easier to see.
- Mark locations on a sketch so a roofer knows exactly where to look.
- Keep receipts and notes for repairs, gutter cleaning and attic work.
- Document storm damage right away. The Minnesota Department of Commerce advises homeowners to photograph damage before cleanup, make reasonable temporary repairs, keep receipts and keep a log of conversations when filing a claim.
Red Flags That Need Prompt Attention
Some findings shouldn’t wait for your next seasonal check. Get a professional out soon if you notice:
- Water dripping or spreading stains inside the house
- A sagging roofline or sagging ceiling
- Several missing shingles or exposed roof deck after a storm
- Daylight through the roof boards
- Widespread curling, cracking or bald spots across a slope
- Damaged flashing at the chimney or where the roof meets a wall
- Large ice dams with water showing up indoors
If water is actively coming in, move belongings, catch drips and protect floors. Do not go up on the roof to tarp it yourself, especially in wet or icy conditions.
Frequently Asked Questions
How often should a homeowner inspect their roof?
Do a quick ground and attic check at least twice a year, in spring and fall, plus after any hail or windstorm. In Minnesota, add a mid-winter look for ice dams and attic frost.
Can I inspect my roof without climbing on it?
Yes. Binoculars from the yard, a look at the gutters and downspouts, and a flashlight check of the attic and top-floor ceilings will reveal most warning signs. Leave anything that requires walking on the roof to a professional.
What are the first signs of a roof problem?
Common early signs are granules collecting in gutters, curling or lifted shingle edges, stains on the underside of the roof deck in the attic, and new water marks on ceilings or the tops of exterior walls.
Does a home inspector walk on the roof?
Not necessarily. Under the InterNACHI Standards of Practice, home inspectors may inspect the roof from the ground or the eaves and are not required to walk on it, so a roofer’s inspection is more detailed.
What should I look for in the attic during a roof inspection?
Look for water stains and soft spots on the roof deck, daylight where there shouldn’t be any, frost on nails or sheathing in winter, damp or thin insulation, blocked soffit vents and exhaust fans venting into the attic.
Should I get a professional roof inspection after a hailstorm?
It’s a good idea if you see dents or spatter marks on gutters, vents or your A/C unit, because hail damage on shingles can be hard to see from the ground. A professional can document it before you decide whether to file a claim.
A twice-a-year walk around the house and a few minutes in the attic will catch most roof problems while they’re still small. When your checklist turns up something you can’t judge from the ground, or your roof is getting older, a professional inspection fills in the rest.
Want a closer look than you can safely get from the yard? Call Minneapolis Roofing Company at (888) 657-0348 for a free estimate.