So, what is thermal shock in roofing? It’s the stress a roof takes when its surface temperature changes quickly, such as when a cold summer downpour hits a roof that’s been baking in the sun, or when temperatures plunge after sunset. Roofing materials expand as they heat and shrink as they cool. When that happens fast, or when the material is held in place and can’t move freely, the stress collects at seams, fasteners and flashings and can lead to splits, cracks and leaks.
Thermal shock rarely destroys a roof in one event. It’s the repeated swings, year after year, that wear materials out. This guide explains how roof temperatures swing, how each common roofing material reacts, the warning signs to look for, and the design and maintenance steps that reduce the damage.
In this article
What Is Thermal Shock in Roofing?
Every roofing material changes size with temperature. Heat makes it expand; cold makes it contract. This everyday movement is called thermal cycling, and roofs are designed to handle a normal amount of it.
Thermal shock is the extreme end of that cycle: a large temperature change in a short time. The roof surface cools (or heats) faster than the layers beneath it and the structure it’s fastened to. Because the parts are connected, the fast-moving surface pulls against the slower-moving parts, and that creates tension.
Why fast changes are worse than slow ones
When temperature changes slowly, the whole roof assembly has time to move together and stresses stay spread out. When it changes quickly, the top layer shrinks while the deck, insulation and fasteners below are still warm and expanded. Research from the National Research Council of Canada showed this effect in bituminous roof membranes: in one test, a membrane cooled by about 110°F over two hours developed measurable tensile stress that kept rising as the temperature fell.
Where the stress goes
Stress concentrates wherever movement is restrained or where two materials meet. That means seams, laps, fastener holes, flashings around chimneys and vents, roof edges and joints in the deck below. These are the spots where thermal shock damage usually shows up first.
How Hot and Cold Does a Roof Get?
A roof surface is often far hotter or colder than the air around it, which is why the temperature swings it experiences are larger than the weather forecast suggests.
- Summer peaks: According to the U.S. Department of Energy, dark or conventional roofs can reach 150°F or more on a sunny summer afternoon. A reflective “cool” roof under the same conditions can be more than 50°F cooler.
- Daytime gain: National Research Council of Canada research found conventional roofing membranes run roughly 54 to 72°F above the air temperature during the day.
- Nighttime loss: At night, the same membranes can drop about 7 to 14°F below air temperature as they radiate heat to a clear sky.
- Daily range: Combined, those day-night swings on a membrane can exceed about 99°F.
Now picture a roof sitting at 150°F when a thunderstorm rolls in and soaks it with rain that’s dozens of degrees cooler. The surface temperature can drop sharply within minutes. The same thing happens on a smaller scale on a clear night after a hot day, and in winter when sun-warmed roofing refreezes as the sun goes down.
How Thermal Shock Affects Each Roofing Material
Different materials expand at different rates and are attached in different ways, so thermal shock shows up differently on each.
Asphalt shingles
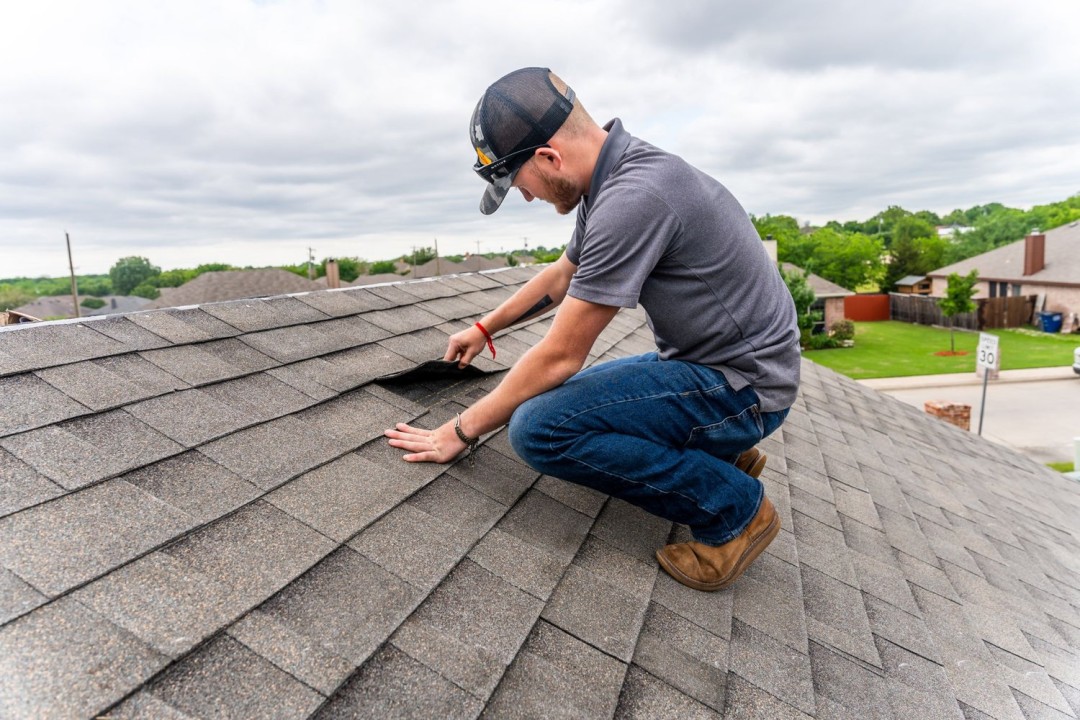
Shingles and the wood deck under them are two separate layers that expand and contract at different rates, but they’re tied together with nails. As shingles cool and shrink, the joints between them in each course open slightly, and the shingle that bridges the joint from the course above gets stretched. Home inspectors call the result thermal splitting.
When the stress passes a critical point, one of two things happens. If the adhesive seal strip is stronger than the shingle, the shingle splits, usually right over the joint below. If the shingle is stronger than the bond, the seal strip lets go, which lowers the shingle’s wind resistance. Thermal splits often form a diagonal, stair-step pattern up the roof that follows the offset of the courses. A true split goes all the way through the shingle, while surface cracking stays in the top layer of asphalt.
According to InterNACHI’s inspection training, fiberglass shingles are more prone to thermal splitting than older organic-mat shingles because their adhesive bonds are usually stronger.
Built-up and modified bitumen roofs
Bituminous membranes, like built-up roofing (BUR) and modified bitumen, are common on flat and low-slope roofs. National Research Council of Canada research found that their rate of thermal contraction actually increases as temperature drops, so they shrink more for each degree of cooling when it’s already cold.
The same research found that splitting is more likely where adhesion to the substrate is uneven, because stress suddenly shifts when a weakly adhered area lets go. It also showed that putting insulation directly under the membrane, which is standard on modern roofs, considerably widens the temperature range the membrane experiences. The insulation keeps building heat from warming the membrane in winter and keeps the membrane from shedding heat into the building in summer. Joints between insulation boards are a common place for splits to start.
Single-ply membranes (EPDM, TPO, PVC)
Single-ply membranes also expand and contract with temperature. They’re usually fully adhered, mechanically fastened or held down with ballast, and the attachment method affects how they cope with movement.
EPDM rubber roofs can suffer from a separate problem called membrane shrinkage, a permanent loss of size over time. Building-envelope consultants (IIBEC) describe it as distinct from normal thermal expansion and contraction, but it hits the same weak spots: it tugs on perimeter edges and flashings, and leaks are often the first sign. It’s most common on loosely laid ballasted systems and some mechanically attached systems, and good membrane restraint at installation is the main defense.
Metal roofing
Metal moves more than most people expect. Metal roofing manufacturer PAC-CLAD gives this example: over a 100°F temperature swing, a 30-foot aluminum panel can move about 7/16 inch, while a similar steel panel moves about 1/4 inch. Aluminum expands and contracts almost twice as much as steel.
Standing seam systems handle this with floating clips that let the panel slide while staying secured, with one end of each panel run pinned and the other free to move. When movement is blocked, metal roofing manufacturer MBCI warns of oil canning (visible waviness), fasteners backing out, slotted (elongated) fastener holes and, most importantly, loss of weathertightness. On exposed-fastener panels, repeated movement works directly against the screws and their sealing washers.
Popping or ticking sounds as a metal roof heats and cools are usually normal and tend to fade as the panels settle into their temperature cycle. They aren’t by themselves a sign of failure.
Flashings, sealants and penetrations
Wherever two different materials meet, such as metal flashing against shingles, a membrane against a masonry parapet, or a plastic vent boot around a pipe, each part moves at its own rate. Sealants and caulks have to stretch and compress with every cycle. Over time they harden, crack and pull away, which is why flashing joints are among the most common leak points on any roof.
Which Roofs Are Most Vulnerable?
Any roof experiences thermal cycling, but some conditions make thermal shock damage more likely:
- Dark, heat-absorbing surfaces that reach very high temperatures in summer sun, setting up a bigger drop when rain or nightfall arrives.
- Membranes installed over insulation, which widens their temperature range, especially where adhesion is uneven.
- Long metal panels fastened rigidly at both ends, or edge trims and transitions that don’t allow the roof to move.
- Shingles sealed tightly across deck joints, where deck movement concentrates stress in a narrow strip.
- Aging materials that have lost flexibility. Older sealants and bitumen are less able to stretch without cracking.
- Poorly ventilated attics, where trapped heat and moisture add to the stress on the deck and shingles.
- Climates with big swings, including places with hot summers and cold winters, frequent freeze-thaw cycles and sudden summer storms.
Signs of Thermal Shock Damage
Thermal shock damage tends to appear gradually. Look for these signs from the ground with binoculars, from a window, or in your attic. Leave anything that requires climbing onto the roof to a professional.
On shingle roofs
- Straight or stair-step splits running through shingles, often lined up over the joints in the course below
- Shingles that have come unsealed and lift or flap in the wind
- Cracked or hardened sealant around flashings, vents and chimneys
- Lines or ridges in the roof surface along deck panel edges
On flat and low-slope roofs
- Splits in the membrane, often running in straight lines over insulation joints
- Open, curling or wrinkled seams and laps
- Membrane pulling away from walls, curbs or roof edges
- Cracks in coatings or surfacing
On metal roofs
- Fasteners that have backed out, or screw holes that have stretched into slots
- Visible waviness (oil canning) that wasn’t there before
- Gaps or distortion at trim, ridge and edge details
Inside the house
- Water stains on ceilings or the underside of the roof deck, especially after storms
- Damp insulation in the attic
- Daylight visible through the roof at seams or penetrations
Many of these signs can also come from age, hail, wind or installation problems. A professional roof inspection can tell you what caused the damage and whether it needs a repair or points to a bigger issue.
How to Reduce Thermal Shock
You can’t stop a roof from expanding and contracting. The goal is to keep temperature swings within a reasonable range and give the roof room to move without tearing itself apart.
1. Ventilate the attic properly
On sloped roofs with an attic, balanced ventilation helps keep heat and moisture from building up under the deck. GAF’s ventilation guidance cites the FHA/HUD rule of thumb of 1 square foot of net free vent area for every 300 square feet of attic floor, split roughly half at the soffits (intake) and half at or near the ridge (exhaust). Exhaust should never exceed intake, and different exhaust types (such as ridge vents mixed with power fans or gable vents) shouldn’t be combined because they can short-circuit the airflow. GAF also notes that damage caused by inadequate ventilation isn’t covered by its shingle limited warranty. Your local building code sets the actual requirement for your home.
2. Insulate and air-seal the right way
Insulation and air sealing keep warm, moist indoor air out of the attic and help stop ice dams. On low-slope roofs, keep in mind that insulation placed under the membrane increases the membrane’s temperature swings. Designers manage this with membranes suited to the expected range, good adhesion or attachment, and in some cases “protected membrane” designs that put the waterproofing below the insulation, where its temperature stays more stable.
3. Consider roof color and reflectivity
A reflective roof surface stays much cooler in summer sun, narrowing the gap between peak temperature and a sudden cold rain. That’s a real advantage for thermal stress. In colder climates, though, the Department of Energy notes that cool roofs can carry a winter heating penalty and may be more prone to condensation if the roof isn’t designed for it, so color choice should fit the building and climate.
4. Build in room for movement
Research on bituminous roofs has long recommended more flexible membranes, expansion joints and attachment methods that allow movement. On metal roofs, that means floating clips on longer panels, slip joints at transitions, expansion accessories at ridges, edges and gutters, and never fixing both ends of a long panel. On large low-slope roofs, roof expansion joints are placed where the structure itself moves.
5. Fasten according to the manufacturer’s instructions
Correct fastening lets each layer move the way it was designed to. Use the fastener type, pattern and spacing the manufacturer specifies, and avoid overdriving or overtightening, which can lock panels in place or crush sealing washers. For wood decks under shingles, APA, the Engineered Wood Association, recommends about a 1/8-inch gap at panel edges and ends so the panels can expand without buckling.
6. Choose materials suited to the job
Ask about how a product handles cold-weather flexibility and movement, especially for low-slope membranes and sealants. Follow the manufacturer’s temperature limits for installation, since some adhesives and sealants don’t bond properly in cold weather.
7. Inspect and maintain regularly
Small splits, open seams and cracked sealant are cheap to fix early and expensive to ignore. Have your roof checked periodically and after severe storms, and reseal or repair flashing details before they let water in.
Thermal Shock vs. Other Causes of Roof Damage
Thermal shock is easy to blame, but it’s rarely the only factor. Roofers and inspectors look at the pattern of damage to sort out the cause:
| Cause | Typical pattern |
|---|---|
| Thermal splitting or shock | Straight or stair-step splits over joints, open seams, cracked sealant, backed-out fasteners |
| Hail | Random, scattered impact marks, bruises and granule loss; dents in soft metals |
| Wind | Lifted, creased or missing shingles, often along edges and ridges |
| Normal aging | Even granule loss, curling, brittleness across the whole roof |
| Installation problems | Repeating patterns tied to nailing, overlaps or panel spacing |
Often several causes work together. Thermal cycling can widen a small hail crack, and poor ventilation can speed up the aging that makes shingles more likely to split.
Frequently Asked Questions
What causes thermal shock on a roof?
Thermal shock happens when a roof’s surface temperature changes quickly, such as when cold rain hits a sun-heated roof or temperatures plunge after sunset. The materials shrink faster than the parts they’re attached to can follow, which builds stress at seams, fasteners and flashings.
Is thermal shock the same as thermal cycling?
They’re related. Thermal cycling is the normal daily and seasonal expansion and contraction of roofing, while thermal shock refers to an especially fast or large temperature swing that concentrates that stress in a short time.
Which roofing materials are most affected by thermal shock?
Dark, heat-absorbing surfaces and materials that are restrained from moving are most at risk. That includes bituminous membranes over insulation, long metal panels fastened rigidly at both ends, and asphalt shingles that are firmly sealed across moving deck joints.
Can thermal shock cause roof leaks?
Yes. Splits in shingles or membranes, loosened fasteners and pulled flashings all open paths for water. The damage often shows up first at seams, edges and penetrations.
Do light-colored roofs reduce thermal shock?
Reflective roofs stay much cooler in summer sun, which narrows the gap between peak surface temperature and a sudden cold rain. In cold climates, the trade-off is a possible winter heating penalty and a higher condensation risk, so the choice should fit the building.
Are metal roof popping noises a sign of damage?
Usually not. Metal roofing manufacturers note that popping sounds from panels expanding and contracting are typically normal and tend to fade as the roof settles into its temperature cycle.
Thermal shock is a normal part of a roof’s life, but it doesn’t have to shorten it. Good ventilation, smart material choices and details that let the roof move will keep the stress in check. If you’re seeing splits, open seams or loose flashing, see our roof repair page for how those problems are fixed.